Introduction
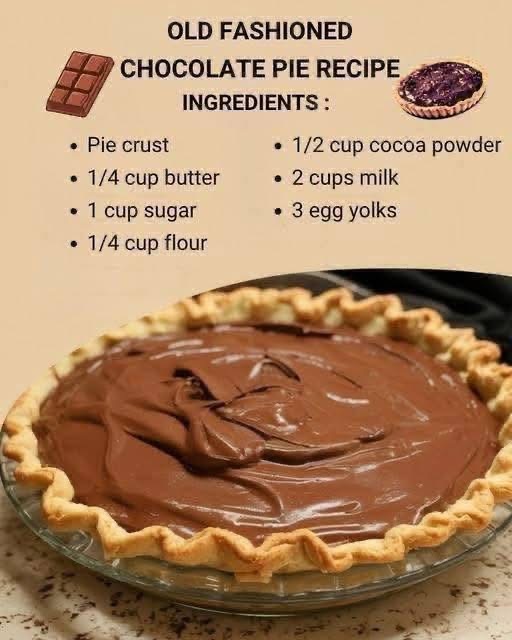
This Old Fashioned Chocolate Pie is a timeless dessert that brings back memories of grandma’s kitchen. With its silky, rich chocolate custard filling nestled in a flaky, golden pie crust, every bite is pure indulgence. Made from scratch with simple pantry staples—butter, sugar, flour, cocoa powder, milk, and egg yolks—this pie is proof that the classics never go out of style. It’s creamy, chocolatey, and perfectly sweet, with a depth of flavor that boxed pudding mixes simply can’t match. Whether you’re baking for a holiday, a family gathering, or just because you’re craving something chocolatey, this pie is guaranteed to satisfy.
Ingredients
· 1 pie crust (homemade or store-bought), baked and cooled
· ¼ cup unsalted butter
· 1 cup granulated sugar
· ¼ cup all-purpose flour
· ½ cup cocoa powder
· 2 cups whole milk
· 3 large egg yolks
· 1 tsp vanilla extract
· ¼ tsp salt
· Optional: Whipped cream, for topping
· Optional: Chocolate shavings or curls, for garnish
Instructions
Step 1: Prepare the Pie Crust
If using a store-bought crust, bake it according to package directions and let it cool completely. If making homemade, blind-bake the crust until golden brown. Set aside.
Step 2: Combine Dry Ingredients
In a medium saucepan, whisk together the sugar, flour, cocoa powder, and salt until no lumps remain.
Step 3: Add the Milk and Egg Yolks
In a separate bowl, whisk the egg yolks with a splash of the milk. Gradually add the remaining milk, whisking constantly. Pour the milk mixture into the dry ingredients, whisking until smooth.
Step 4: Cook the Filling
Place the saucepan over medium heat. Cook, stirring constantly with a whisk, until the mixture thickens and comes to a gentle boil. This should take about 5–7 minutes. Once it boils, cook for 1–2 minutes more, stirring constantly, until very thick.
Step 5: Add the Butter and Vanilla
Remove from heat. Stir in the butter and vanilla extract until the butter is melted and the filling is smooth and glossy.
Step 6: Pour into the Crust
Pour the hot filling into the cooled pie crust. Smooth the top with a spatula.
Step 7: Chill
Cover the pie with plastic wrap, pressing it directly onto the surface of the filling to prevent a skin from forming. Refrigerate for at least 4 hours, or overnight, until completely set.
Step 8: Serve
Top with whipped cream and chocolate shavings if desired. Slice and serve chilled.
Methods
Method 1: Classic Stovetop (as written above)
Best for a rich, silky custard filling with deep chocolate flavor.
Method 2: No-Bake Version
Use a graham cracker or Oreo crust instead of a baked pie crust for a no-bake dessert.
Method 3: Chocolate Meringue Pie
Top the pie with a fluffy meringue made from the leftover egg whites, then bake at 350°F (175°C) for 10–12 minutes until golden.
Method 4: Gluten-Free
Use a gluten-free pie crust and substitute the flour with cornstarch or gluten-free flour blend.
Method 5: Mini Pies
Divide the filling among mini tart shells or ramekins for individual servings.
History
Chocolate pie has been a beloved American dessert since the late 19th century, when cocoa powder became widely available and affordable. Before that, chocolate was a luxury reserved for the wealthy. The invention of Dutch-processed cocoa by Coenraad van Houten in 1828 made chocolate more accessible for baking, and soon home cooks were creating chocolate custards, puddings, and pies. Old-fashioned chocolate pie, also known as chocolate custard pie, became a staple in Southern kitchens, where it was served at Sunday dinners, holidays, and church potlucks. The recipe traditionally uses simple ingredients—cocoa, milk, eggs, sugar, and flour—to create a rich, silky filling that sets as it cools. It’s a dessert that has stood the test of time, remaining a favorite across generations.
Benefits
· Simple Ingredients: Basic pantry staples you likely already have.
· Budget-Friendly: Cocoa powder, milk, and eggs are inexpensive.
· Rich and Satisfying: Deep chocolate flavor in every bite.
· Make-Ahead Friendly: Can be made a day in advance.
· Crowd-Pleaser: Always a hit at holidays and gatherings.
· Versatile: Can be topped with whipped cream, meringue, or chocolate shavings.
· Nostalgic: Tastes like childhood memories.
· Gluten-Free Option: Easily made gluten-free with a gluten-free crust and cornstarch.
Variations
· Chocolate Meringue Pie: Top with meringue and bake until golden.
· Chocolate Cream Pie: Fold in 1 cup whipped cream for a lighter filling.
· Peanut Butter Chocolate Pie: Add ½ cup peanut butter to the filling.
· Coconut Chocolate Pie: Add ½ cup shredded coconut to the filling.
· Espresso Chocolate Pie: Add 1 tsp espresso powder for depth.
· Mexican Chocolate Pie: Add ¼ tsp cinnamon and a pinch of cayenne.
· Vegan: Use plant-based milk, vegan butter, and cornstarch instead of eggs.
Conclusion
This Old Fashioned Chocolate Pie is the ultimate comfort dessert. Rich, creamy, and deeply chocolatey, it’s the kind of pie that makes people close their eyes and sigh with happiness. The silky custard filling pairs perfectly with a flaky pie crust, and a dollop of whipped cream takes it over the top. Whether you’re baking for a holiday, a family dinner, or just because you deserve a treat, this pie delivers every time. It’s simple, classic, and utterly irresistible—a true taste of tradition.
For the Lovers
For those who truly adore this pie, here are the best ways to enjoy it:
· The Classic: Serve chilled with a dollop of whipped cream.
· The Meringue Lover: Top with toasted meringue for a show-stopping presentation.
· The Chocolate Lover: Drizzle with melted chocolate and sprinkle with sea salt.
· The Coffee Companion: Pair with a hot cup of coffee or espresso.
· The Leftover Lover: Store in the refrigerator for up to 3 days. Keep covered to prevent a skin from forming.
· The Gift: Bake in a disposable pie tin and deliver to a friend or neighbor.
· The Party Platter: Slice and arrange on a platter with fresh berries.
Final Methods Recap
· Method 1: Classic Stovetop—combine dry ingredients, add milk and egg yolks, cook until thick, add butter and vanilla, pour into crust, chill 4 hours.
· Method 2: No-Bake—use a graham cracker or Oreo crust.
· Method 3: Chocolate Meringue—top with meringue and bake at 350°F (175°C) for 10–12 minutes.
· Method 4: Gluten-Free—use gluten-free crust and cornstarch or gluten-free flour.
· Method 5: Mini Pies—divide filling among mini tart shells or ramekins.